
Creating a macOS Action (Gear) Button Programmatically in Swift
For a list of actions on macOS, the standard control is an action button as defined in the macOS Human Interface Guidelines.
Here’s the definition from that page:
An action button (often referred to as an action menu) is a specific type of pull-down button that operates like a contextual menu, without the disadvantage of being hidden, providing access to app-wide or table-specific commands. An action button includes a gear icon when closed and a downward arrow indicator that alludes to its menu. Action buttons are often used in toolbars, but can also be used in the content area of a view beneath a table view.
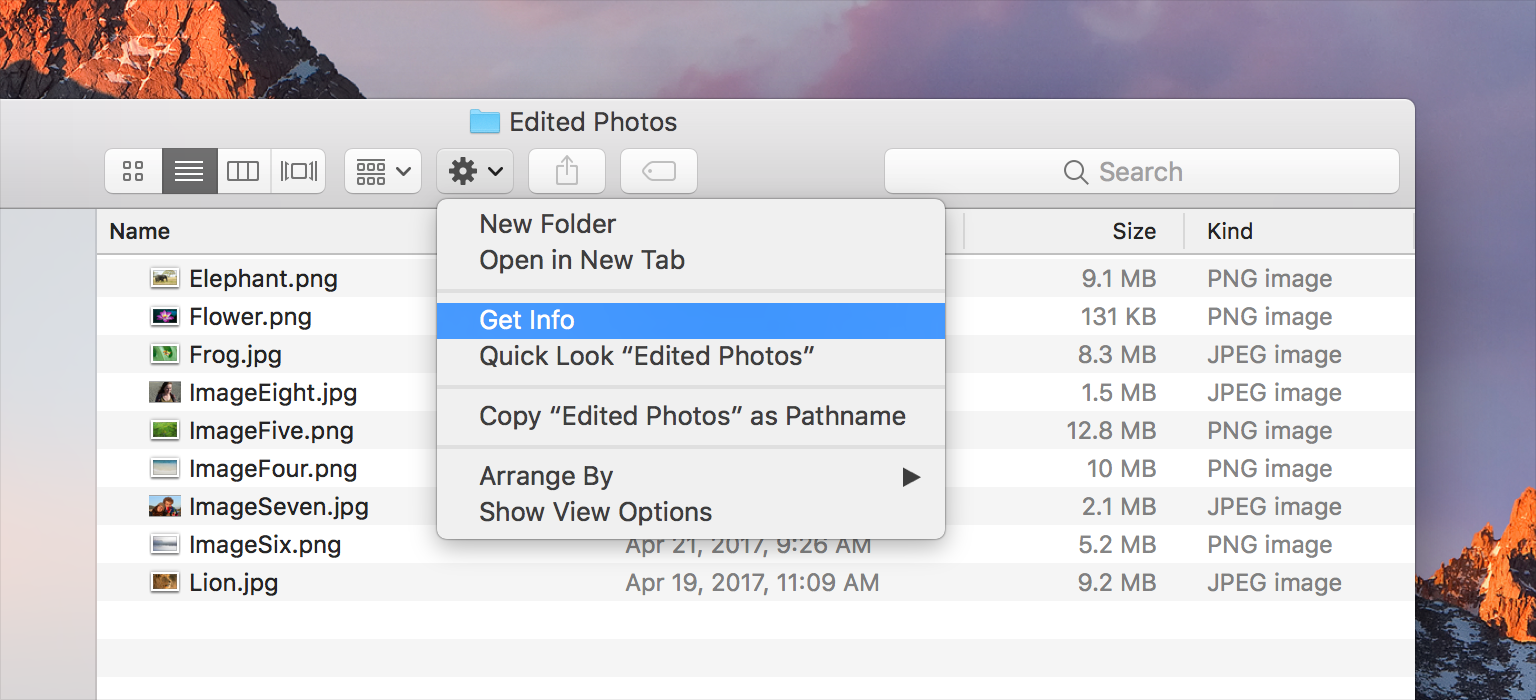
Apple isn’t very clear about how to create one of these in code. They tell you to create a button using the system-provided gear icon by making use of the NSImageNameActionTemplate image name, but try as I might, I couldn’t replicate the action button used in Finder from that image name alone.
It turns out that there are a few more steps involved.
Create an NSPopupButton
let actionButton = NSPopUpButton(frame: .zero, pullsDown: true)
It’s clear that the button is an NSPopupButton due to the dropdown that it presents.
Position the button
view.addSubview(actionButton)
actionButton.translatesAutoresizingMaskIntoConstraints = false
NSLayoutConstraint.activate([
  actionButton.centerXAnchor.constraint(equalTo: view.centerXAnchor),
  actionButton.centerYAnchor.constraint(equalTo: view.centerYAnchor)
  ])
Position the button where you need it. For the purposes of this demo, I’m leaving it right in the middle of the parent view. For the reasoning behind actionButton.translatesAutoresizingMaskIntoConstraints = false, take a look at my post on autoresizing masks.
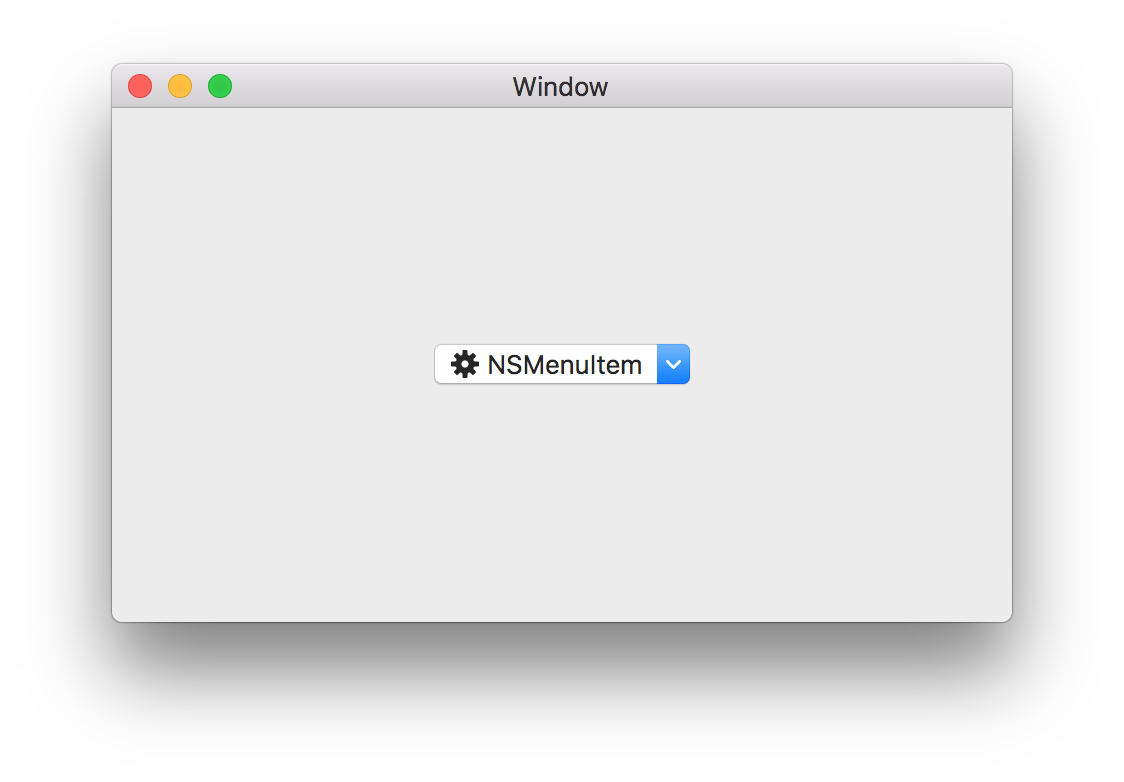
We’ve created the button and positioned it in the view. This is the result:

It’s coming together!
Add some items
["Option 1", "Option 2", "Option 3"].forEach(actionButton.addItem)
An action button isn’t too useful without some actions. With an array of item titles, we use the forEach operator to add the items to the action button. You’ll see these options when clicking on the dropdown arrow.
Add the gear icon
let actionItem = NSMenuItem()
actionItem.image = NSImage(named: .actionTemplate)
actionButton.menu?.insertItem(actionItem, at: 0)
From the Human Interface Guidelines section on Action Buttons, we learnt that the .actionTemplate image name will give us the appropriate gear icon.
Don’t forget to insert the gear icon as the first item in the menu, or it won’t show up as the button’s icon.
Looking good, but we need to remove the text and the blue styling around the dropdown arrow.
Style the cell
let cell = actionButton.cell as? NSButtonCell
cell?.imagePosition = .imageOnly
cell?.bezelStyle = .texturedRounded
On macOS, most of the UI configuration is done by modifying the NSCells belonging to your views.
actionButton.cell is of type NSCell, but the properties that we need exist on NSButtonCell. We know that the cell is an NSButtonCell because the actionButton is a type of NSButton, so we cast the cell as an NSButtonCell.
Next, we set the imagePosition to get rid of the text that was displaying on the button.
To style the shape of a bordered button, we make use of the bezelStyle property. Kuba Suder has a guide to NSButton styles that is invaluable when creating buttons in code.
To get rid of the blue dropdown arrow, make use of the .texturedRounded style. That gives us our final result:
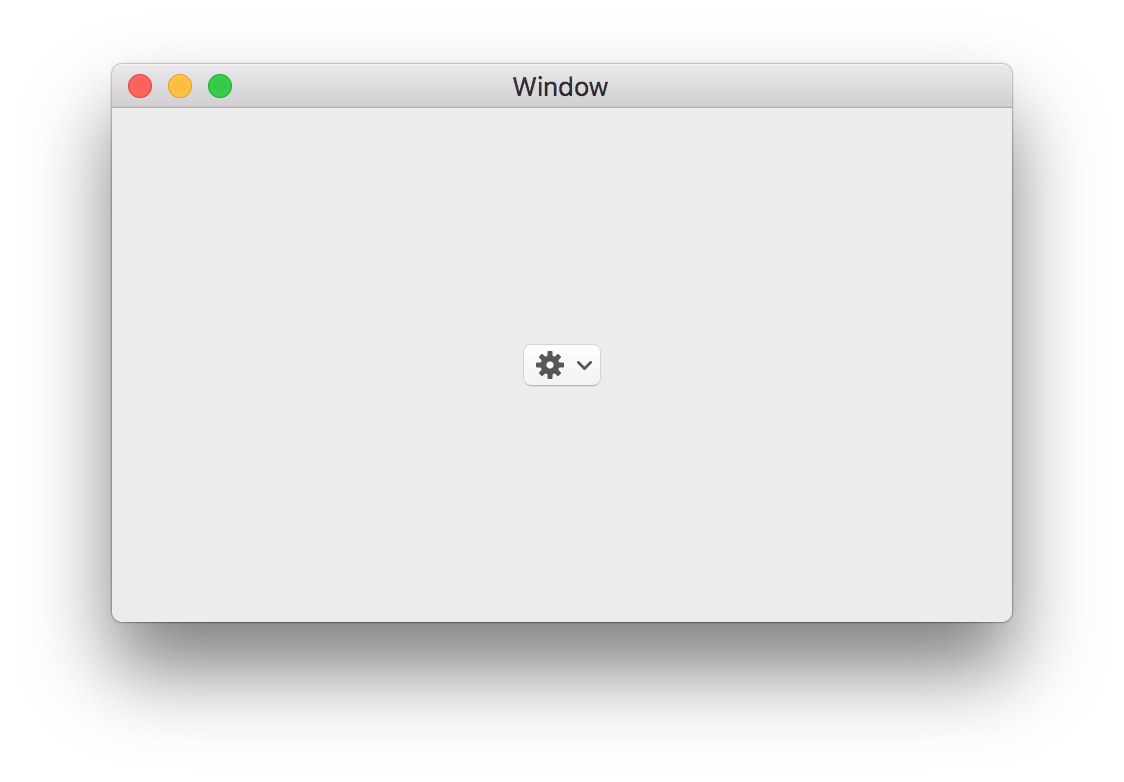
A button that fully matches the system’s action button. Here’s all of the code together:
I hope that this post has been useful to you, and that you’ve enjoyed this small foray into macOS development. Are you an iOS developer that’s been playing around with macOS? I’d love to hear about your journey in the comments below.
Comments